FRUIT ZOMBIE SURVIVAL / FIELD GUIDE
How to Get Diamonds in Fruit Zombie Survival — September 2026
Start with three separate checks: the Diamonds earned field after a completed run, the conditions on a Diamond-reward quest, and the reported code list. A reward reported for one source is not a payout formula for another. The existing 320-Diamond example is one displayed result, not a guaranteed Wave-10 reward or a repeatable one-minute method.
Sources reviewed: September 11, 2026 (PDT). This is a source review, not an in-game test.
- Run rewards
- A completed-run summary with a displayed Diamonds earned field.
- Code route
- The correct Roblox experience and an exact reported code string.
- Scope
- No specific map, fruit, level or paid multiplier is assumed by this guide.
Separate run rewards, quest rewards and code rewards
Identify the record you are reading before comparing Diamond amounts.
| Reward source | What to read | What not to assume |
|---|---|---|
| Completed run | The Diamonds earned field on the result screen. | One result is not a guaranteed reward for every run or wave. |
| Diamond-reward quest | The objective, its conditions and its displayed Diamond reward. | A quest counter is not automatically the reward total for your current run. |
| Reported code | The exact code string, its reported reward and the game's redemption response. | A reported code reward is not repeatable normal-play income. |
Published guides describe Diamond-reward quests alongside normal run rewards. Use the quest conditions section to distinguish those objectives from the Flame quest panel in the existing result example.
Check your Diamonds in four steps
This process helps you identify the reward actually shown by the game and try the reported code route without treating a guide’s headline as a guaranteed farming method.
Play through and read the completed result
Use the normal fruit, zombie-wave and Berries upgrade loop. When a completed-run summary is available, find Diamonds earned. Read that field for the displayed reward rather than treating the wave number or zombie count as a Diamond total.
Keep the three result fields separate
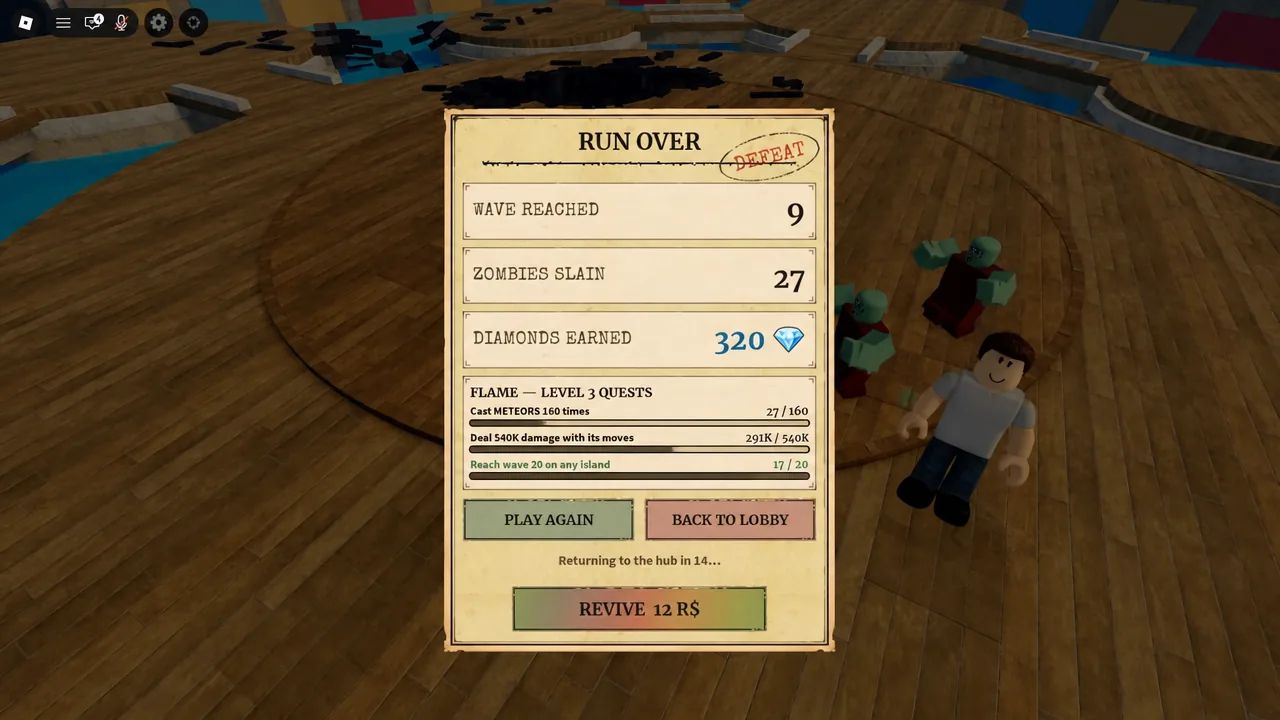
Record the displayed wave, zombies slain and Diamonds earned if you want to compare attempts. In the published example these values are 9, 27 and 320. The example shows one outcome; it is not a formula you can apply to your next run.
Check the reported Diamond code
Open the Codes page and find Disc0rd, whose reported reward is 1,500 Diamonds. The character after c is a zero. Use the exact copyable string; current redemption success has not been independently confirmed by this site.
Read the redemption response
Published guides describe Settings near the upper-left, the field marked Join Discord for codes, and Redeem. Paste the exact code, submit it and read the game’s response. If it fails, check the spelling and correct experience before assuming expiration or buying anything to unlock the reward.
What the 320-Diamond example actually shows
A run-summary image published with a September 7 farming article shows Wave 9, 27 zombies slain and 320 Diamonds earned. Its capture date and game build are not identified. The screenshot does not prove a required Wave-10 boss kill, a guaranteed reward for every account, or a repeatable one-minute run. Use it to understand the labels on a result screen, not to decide when to reset your game.
| Displayed result | Value |
|---|---|
| Wave reached | 9 |
| Zombies slain | 27 |
| Diamonds earned | 320 |
Read the run result separately from Flame quests
The example shows Wave reached: 9 near the top and 17 / 20 beside a wave-related quest below. Those numbers appear under different labels; do not use the quest counter as the wave result or Diamond reward for that run.
The upper result fields show the run's wave, zombies slain and Diamonds earned. The lower section is titled FLAME — LEVEL 3 QUESTS and contains separate objectives for ability use, damage and reaching a wave target.
To read the image correctly, use Diamonds earned for the displayed run reward and read each quest's own label for its progress. The pictured 320 is a run-result value, not a reward amount printed beside the Flame quests.
The image does not explain how quest progress carries between runs or what completing those tasks unlocks. It supports this distinction between labels, not a complete Flame upgrade guide.
View the original result and quest-panel example.
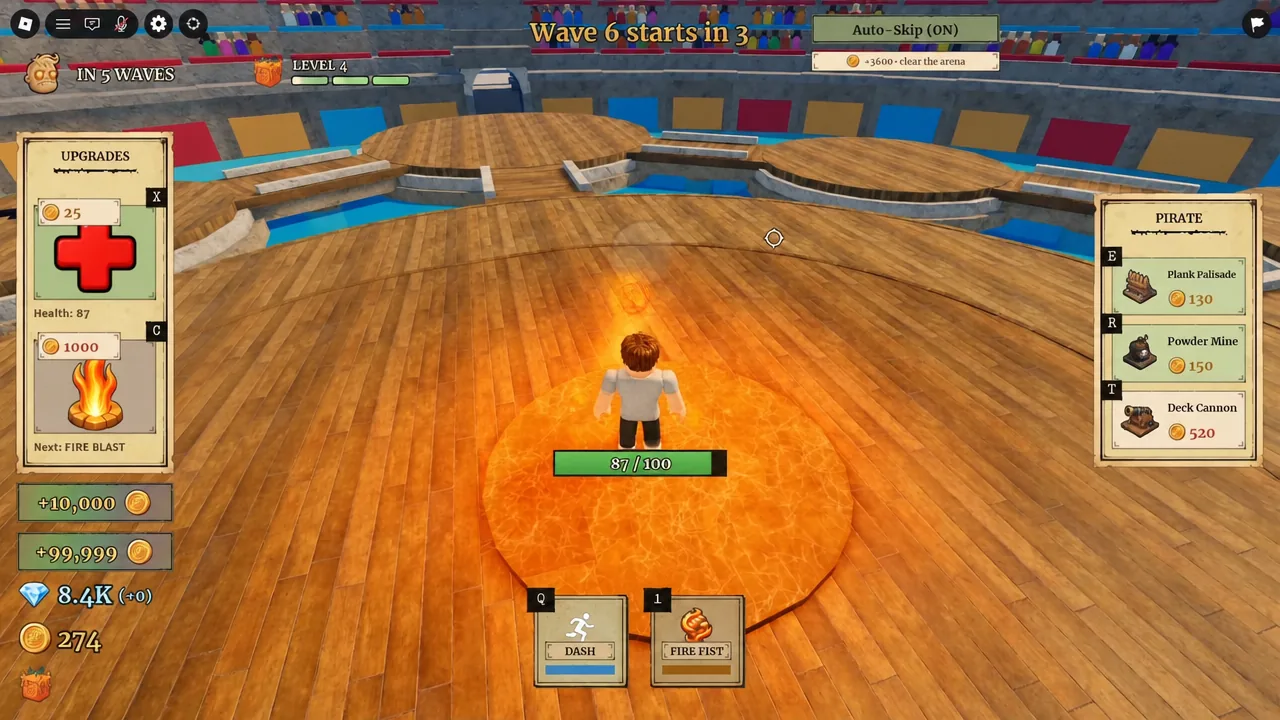
For the interface during a run, compare abilities, upgrades and builds.
Check the conditions on Diamond-reward quests
Published guides describe a lobby quest board with Diamond rewards. Check that board before choosing the objective for your next run. These reward quests are a separate reference from the FLAME — LEVEL 3 QUESTS panel shown in the existing run-summary example.
Read the objective's full condition rather than only its progress counter. The reviewed guides describe tasks involving zombie defeats, surviving or clearing waves, and helping defeat bosses.
Check three kinds of conditions
Location. When an objective names a map or area, match that location before working on it. Do not assume progress earned somewhere else qualifies.
Participation and survival. A condition about clearing waves while alive and fighting is more specific than simply seeing a wave number increase. Check the wording before treating another player's progress as your own.
Boss conditions. Read whether the objective requires helping defeat a boss and whether a wave threshold is specified. Reaching a wave and receiving credit for a qualifying boss defeat are different things.
Plan a run around compatible objectives
Choose objectives whose written conditions can be met together, such as zombie defeats and active wave survival in the required location. After the attempt, compare each objective's own progress with what it showed before the run. Keep that check separate from the run's Diamonds earned field and from any code redemption.
If progress appears unchanged, check the location, participation requirement and boss condition first. A missing increment alone does not establish a bug, a paid-access requirement or a known reset rule.
The board's current objective and reward labels are the relevant reference for that task. This section does not establish a universal quest payout table, a reset schedule, automatic reward-claim behavior or a guaranteed hourly income. Do not add a quoted board total to every run as though it were a fixed bonus.
For the builds you can use during a run, read class and fruit choices.
Quest overview reviewed: September 15, 2026 (PDT). Sources: All Things How's quest-board discussion and GameStratWiki's quest overview. Their written descriptions were reviewed; no quest completion, current board screenshot or reset cycle was independently tested for this section.
Compare your own attempts without inventing a rate
If you want to compare results, keep notes from completed attempts and include the actual time you spent, including menus and waiting. Treat any calculation from those notes as your own observed result under those conditions. One unusually short or rewarding attempt does not establish a dependable hourly rate. Do not mix code rewards into the run total when comparing normal play.
If your result is different
A result different from 320 does not by itself identify a bug. The example is not a verified reward formula. If the attack key in a farming guide also differs from your screen, follow your displayed binding; a published desktop example shows Fire Fist on 1, not a universal V key. Return to the beginner checklist if the wave and upgrade loop is still unclear, then inspect your next completed result.
Mistakes to avoid
Calling 320 a guaranteed Wave-10 payout
The cited image shows Wave 9 and one 320-Diamond result. Do not turn that example into a payout rule.
Counting a code reward as normal farming income
Keep reported redemption rewards separate from Diamonds earned in a run.
Resetting because a guide promises a one-minute route
This guide does not verify reset behavior or a fixed farming rate; follow your own completed result.
Buying a pass because a code fails
A failed code does not prove a VIP or paid-access condition. Check spelling and the correct experience first.
Questions & answers
How can I get Diamonds in Fruit Zombie Survival?
Read the Diamonds earned result after a completed run, check the conditions on Diamond-reward quests, and review the separately reported rewards on the Codes page. Keep these records separate; a code amount or quest counter is not a formula for normal run income. See Diamond quest conditions before planning a run around an objective.
Does Disc0rd give 1,500 Diamonds?
That is the reward reported by the cited code lists. The string contains a zero after c, and current redemption success has not been independently confirmed.
Are 320 Diamonds guaranteed after Wave 10?
No such guarantee is established. The published example shows Wave 9, 27 zombies slain and 320 Diamonds; it is one displayed result.
Can I earn 320 Diamonds every minute?
The available screenshot does not establish a repeatable one-minute run. A fixed per-minute or hourly income claim would need more than this single result.
Should I reset a run to farm Diamonds?
This guide does not verify how resetting affects rewards. Do not reset solely because a guide promises a fixed payout.
What should I spend Diamonds on first?
This guide does not establish a universal first purchase. Before spending on a class, compare the role you need: damage, control, healing or protection for builds. Use the class and fruit choices guide, then check the current price and requirement in the game. A role comparison is not a verified price list or a promise of a particular reward rate.
Choose your next step
Reported codes and rewards
Find Disc0rd and follow the full redemption instructions.
Beginner run checklist
Learn the fruit, wave and Berries upgrade loop.
Sources and official links
Check the game identity and the guide’s source boundaries.